We needed a planter to stand against our house wall. So I made this one from tongued and grooved boards, the bottom box is 24" wide, 13" deep and 11" high. The trellis is 54" high. I couldn't find any suitable trellis to buy from the garden centers so I cut the lattes on my band saw and pinned and glued them onto the frame to form the trellis. I coated the planter with Sage paint.
Wednesday, 11 June 2014
Shooting Board and plane handle
We used a shooting board at the West Dean college dovetail course a few weeks ago so Chris and I decided to make ourselves one each. The board is made from 3/4" (18mm) plywood and is 31" long and 10" wide. We attached a piece of maple to it to form the work-piece stop. To fit the stop we clamped a set square on the base board then glued the stop down while held tightly against the square. When the glue had dried we added the 3 screws for extra strength.
We also made a 45 degree block to allow us to shoot mitres. The base of the board has a small piece of ply attached to allow us to fasten it into a vice for stability.
Of course you also require a substantial plane to use on the board. I have a Woden no. 7 plane that suits the job. The problem I find is that the plane doesn't lend itself to being used on edge and after a while I find my fingers and hand becoming sore.
I did a search on the internet for examples of handles and came across an article written by Al Frampon on the Lee Valley tools website
http://www.leevalley.com/US/newsletters/Woodworking/5/5/article1.htm.
Al describes seeing Alan Peters using a home made handle on his shooting plane, on one of his DVD's. I thought it looked promising, so I had a go at making one from some old sapele(?) skirting board I rescued from a skip (dumpster).
I pretty well followed the design described by Al adding a handle for added grip and I find and it works well.
If you want a Lie Nielsen hot dog handle they are available at Axminster tools for £54.44 see below.
Saturday, 17 May 2014
Dovetails are improving - part II

I wanted to try my hand at dovetailing before I attended a course at West Dean college with furniture and toolmaker David Barron.
I joined the course on the Friday evening and following dinner at 7 pm we were straight into the workshops for an introduction. David checked our chisels and planes and we realized we all needed to give them an extra hone up ready for the next day. In my case this took about 2 hours!!!. Good to tell I hadn't got the hang of this sharpening game.
Bright and early next morning we were queuing up a raring to go.

Our first job was to learn how to cut vertical lines using Davids magnetic dovetail guide and a Japanese saw (a Gyochucho 372 ’traditional’ dozuki.)
The dovetails were measured out, then David's magnetic guide was used to guide the saw blade at the correct angle down to the baseline.
The excess timber is then sawn out using a fine coping saw before the remainder is chopped out by chisel.
Once the pins are cleaned up, the tails are then marked using a very fine knife. The saw and chop process is again used to remove the waste.
David had prepared the beech timber we were going to use for our project, an 11" * 5" * 3" high box with spalted beech lid. We marked out the 16 dovetails an repeated the process we used doing the test joint. Great care was required to ensure all of the corners were marked correctly and kept together.
After a few hours we assembled the box sides and fitted the base. We then added a four piece liner with a cut-away section to allow the box to be opened by depressing the lid at one end. Finally we fitted the spalted beech lid.
The box was coated with melamine resin to protect it and buffed up.
As you can imagine - I am really pleased with the progress I have made with Davids help. I cannot recommend this course highly enough.
Great guys and a great tutor!
My toolbox
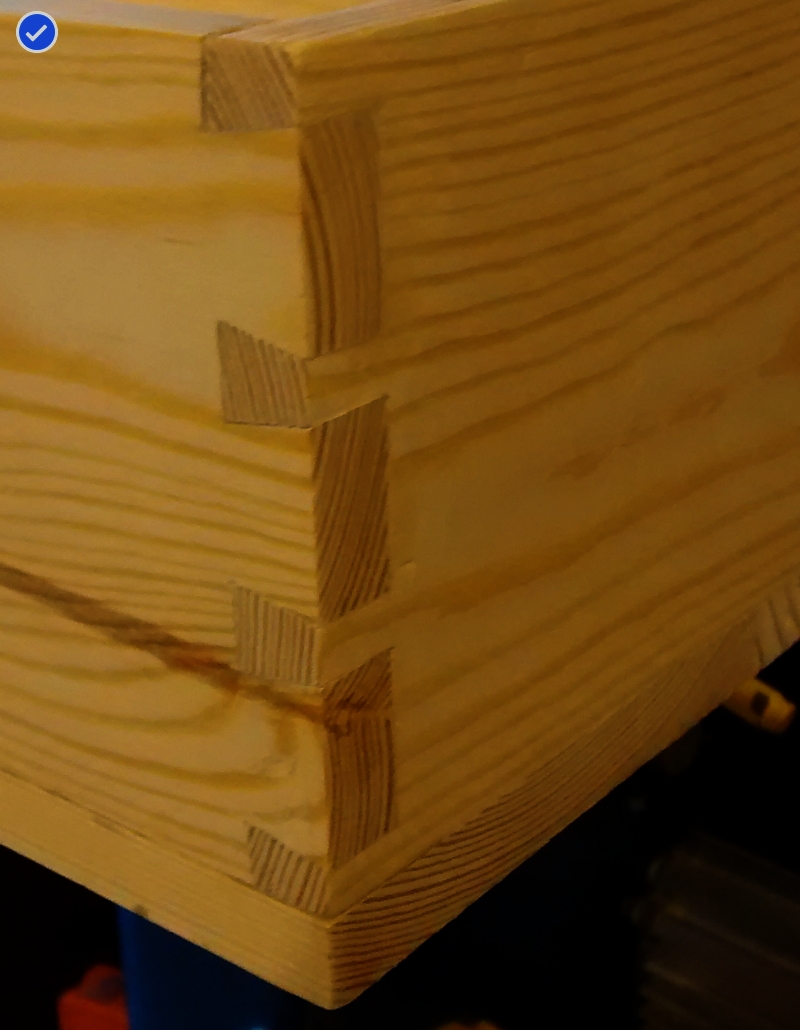
I recently attended a training weekend at West Dean College with my son Chris and six other guys. We were tutored by David Barron and were shown how to cut dovetails.
I needed a toolbox to take my tools to the course in and while at Yandles woodworking show a couple of months ago, I spotted a suitable pine box across the road at a small antiques shop. It cost me £10.
The box measures 22 3/4" long and 8 2/4" wide and the same high. The pine sides are 1/2" thick. The box was empty and had two holes bored in the lid. (I wonder if, at one time, it was used for carrying livestock.)
I fitted 2 clips on the front to keep the lid closed, and cut up an old leather belt bought from a charity shop to make the carry handle.
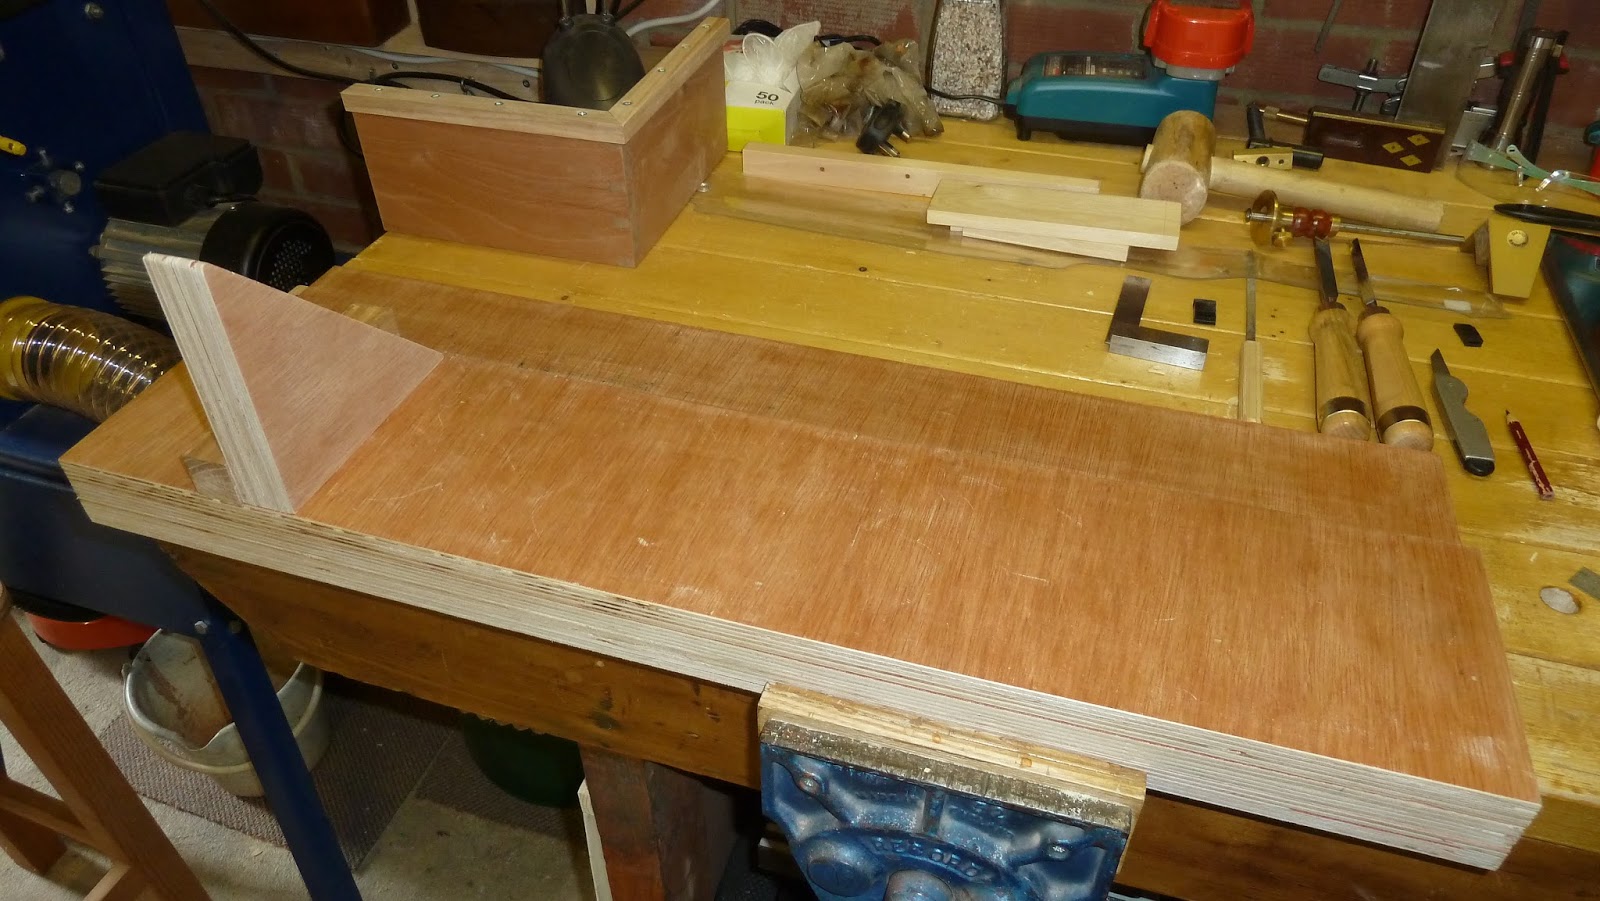
Inside, I made a tray with dovetails to sit onto the ledges I installed. I also added a few fittings to hold my tools secure. As you can see I have a mix of old and new tools, I guess I will refine my collection as my skills improve. The idea of having an old pine toolbox which has some history is quite inspiring. I guess I will make my own tool chest eventually but for now I am happy with my choice.
Monday, 21 April 2014
Saturday, 5 April 2014
Old tool chest
Old woodworkers chest.
I recently visited my father ("Stan the Blacksmith" - see earlier posts) in Lincolnshire, UK.
The chest is approx 25" long, 15 1/4" front to back and 16 1/4" high. It is constructed of 9/16" pine boards.
The handles are of the same design as in the book.
Lastly 2 things of note...
I recently visited my father ("Stan the Blacksmith" - see earlier posts) in Lincolnshire, UK.
I had been reading about the Woodworkers tool chest in Bernard E Jones "The Practical Woodworker - (Volume 2, page 472).
When I visited Dads old hobby shed to collect a tool, I noticed a similar chest to the one in the book next to his work bench. I was curious so decided to empty it and bring out into the back yard to examine it more closely.
The chest is approx 25" long, 15 1/4" front to back and 16 1/4" high. It is constructed of 9/16" pine boards.
The sides are joined to the front and rear by 8 dovetails. The base is nailed on.
![]() |
Side / front / lid corner |
![]() |
Side / front / base corner |
![]() |
Handle plate approx. 2 1/4" * 4 1/4" |
I was hoping the inside of the chest would be fitted out the same as the book with tills and tool retainers. Sadly this wasn't the case...
![]() |
Inner rear |
![]() |
Inner front |
There are a couple of slots for tools but I guess most of the tools would be stored loosely in the chest. The chest is fitted with a lock for security.
![]() |
Front |
![]() |
Lid |
- You will have noticed the chest is lined with newspaper. When I looked at this in detail, I saw it was from the "The Manchester Guardian" dated Saturday February 21st 1857! - 157 years old! much older than I expected.
- The other curious thing is that although many of the wooden objects in Dad's shed suffer from woodworm, there is no sign of worm attack in the chest. The chest is painted with some kind of black paint or lacquer - possibly containing lead. Also it is lined with newspaper - I wonder if these have repelled the woodworm.
I look forward to your comments.
Tuesday, 25 March 2014
Engineers vice finds a new home.
My Engineers vice has sat neglected on the garage floor awaiting me to mount it on my workbench. It is only used occasionally, so I decided to attach it to a jig that can easily be attached and removed from bench. I made use of the dog holes I have in the bench, using dowl pegs to locate the vice. I then secure it with a screw through the jig and into the front apron of the bench.
Subscribe to:
Posts (Atom)